
The checkerboard bathroom floor pattern has been a classic choice for generations, offering a timeless look that suits both traditional and modern interiors. Its bold geometric design instantly adds visual interest and can transform even the smallest bathrooms into striking spaces. Whether you prefer a high-contrast black-and-white scheme or a more subtle combination of tones, this flooring style offers endless versatility.
In this guide, you’ll discover creative ways to use checkerboard layouts, practical tips for choosing materials, and inspiration for integrating this pattern into your own bathroom. If you’re considering a renovation or simply want to refresh your space, exploring checkerboard flooring can provide the visual impact you’re seeking. For a broader overview of bathroom flooring options, you may also find the Bathroom flooring buyer’s guide helpful as you plan your project.
Why Choose a Checkerboard Tile Design?
Opting for a checkerboard tile pattern in your bathroom brings both style and function. The alternating squares create a sense of movement and depth, making small rooms appear larger and more dynamic. This layout also works well with a range of materials, from classic ceramic to modern vinyl and even natural stone.
- Timeless Appeal: This motif never goes out of fashion, ensuring your bathroom remains stylish for years.
- Versatility: Pair with vintage fixtures for a retro look or sleek hardware for a contemporary vibe.
- Easy Maintenance: Most checkerboard floor materials are simple to clean and resistant to moisture.
For those interested in mixing different tile styles, check out these tips on mixing tile styles on bathroom floor to create a unique and personalized space.
Popular Color Combinations for Checkerboard Floors
While black and white is the most iconic pairing for this pattern, there are many ways to customize the look to suit your taste. Here are some popular color schemes:
- Black & White: The ultimate classic, perfect for both vintage and modern bathrooms.
- Gray & White: Offers a softer, more understated effect while maintaining visual interest.
- Beige & Cream: Ideal for those who prefer a warm, neutral palette.
- Bold Contrasts: Navy and white, green and cream, or even terracotta and sand for a Mediterranean feel.
- Wood Tones: Combine wood-look tiles in light and dark shades for a cozy, natural twist on the checkerboard motif.
Choosing the right color combination can set the tone for your entire bathroom. If you’re unsure about which hues to select, consider your wall colors, fixtures, and overall design goals.
Materials and Finishes for Checkerboard Bathroom Floors
The material you choose for your checkerboard pattern will impact both the look and durability of your floor. Here are some of the most popular options:
- Ceramic and Porcelain Tiles: Durable, water-resistant, and available in a wide range of colors and finishes.
- Vinyl Tiles or Planks: Budget-friendly, easy to install, and comfortable underfoot. Modern vinyl can convincingly mimic stone or wood.
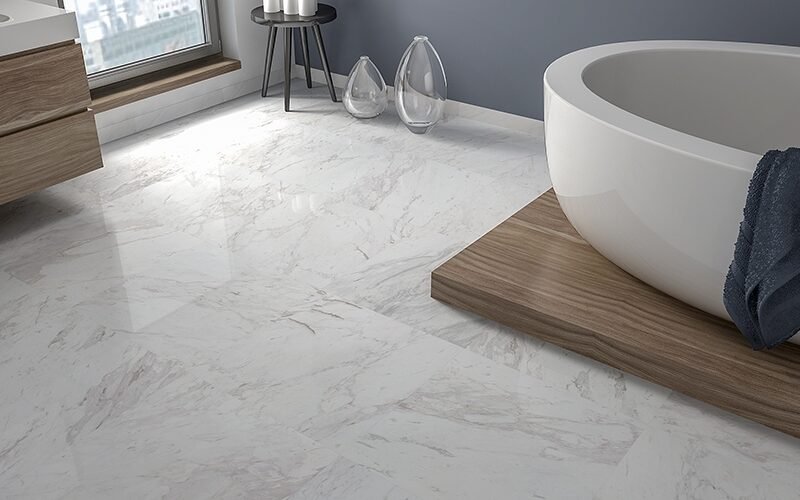
- Natural Stone: Marble, granite, or limestone tiles offer a luxurious feel and unique veining, though they require more maintenance.
- Peel-and-Stick Tiles: A great DIY option for renters or those seeking a quick update.
When selecting materials, consider slip resistance, ease of cleaning, and compatibility with underfloor heating if desired. For more guidance on budget-friendly choices, explore the most affordable bathroom flooring options.
Creative Layouts and Installation Tips
While the traditional checkerboard is laid with tiles aligned to the walls, there are several creative ways to make this pattern your own:
- Diagonal Layout: Rotating the pattern 45 degrees adds a dynamic, diamond-like effect and can make a narrow bathroom feel wider.
- Bordered Checkerboard: Frame the pattern with a solid color border for a tailored, finished look.
- Mixed Materials: Combine glossy and matte tiles or different textures for added depth.
- Large-Format Tiles: Oversized squares create a bold, modern statement, while smaller tiles evoke vintage charm.
For a flawless installation, ensure your subfloor is level and dry. Use tile spacers for even grout lines, and plan your layout from the center of the room for symmetry. If you’re new to tiling, learning how to avoid lippage in tile installation can help you achieve a smooth, professional finish.
Inspiration: Modern and Classic Checkerboard Bathroom Floors
The checkerboard motif can be adapted to suit a variety of design aesthetics. Here are a few inspiring ways homeowners and designers are using this pattern:
- Monochrome Minimalism: Pair black and white tiles with simple fixtures and minimal decor for a crisp, uncluttered look.
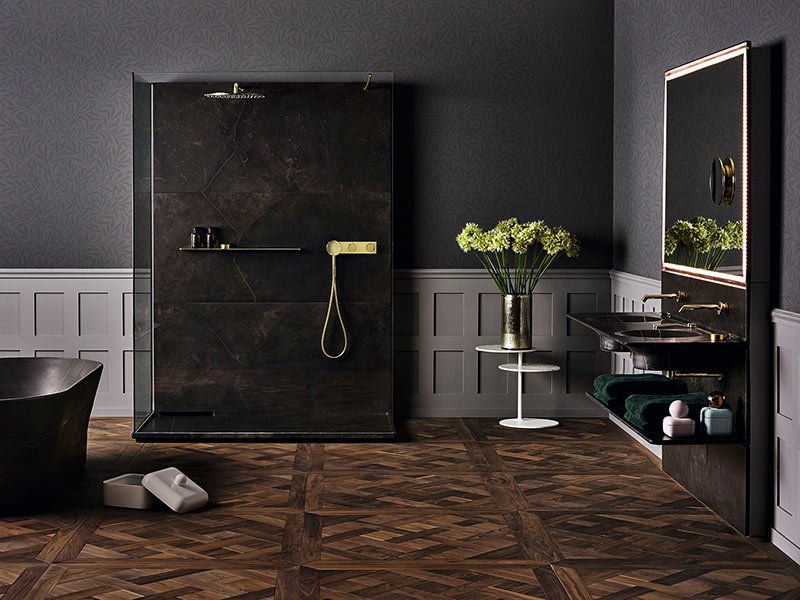
- Vintage Glamour: Combine the pattern with clawfoot tubs, brass fittings, and ornate mirrors for a nod to Art Deco or Victorian style.
- Rustic Retreat: Use wood-look tiles in a checkerboard layout to bring warmth and texture to country or farmhouse bathrooms.
- Spa-Inspired Serenity: Soft gray and white tiles, paired with natural stone and greenery, create a calming, spa-like atmosphere.
For more visual ideas and current trends, you can browse bathroom flooring styles and trends from leading designers.
Tips for Choosing the Right Tile Size and Grout
Selecting the ideal tile size is crucial for achieving the best checkerboard effect. Large tiles can make a small bathroom feel more expansive, while smaller tiles add intricate detail. Consider the scale of your space and the look you want to achieve.
- Small Bathrooms: Opt for medium-sized tiles (8–12 inches) to avoid overwhelming the space.
- Large Bathrooms: Larger tiles (16 inches or more) create a bold, seamless appearance.
- Grout Color: Choose a grout that matches one of your tile colors for a cohesive look, or a contrasting grout to highlight the pattern.
For more advice on tile sizing, see the guide on how to choose bathroom tile size to ensure your checkerboard design fits your bathroom perfectly.
Maintenance and Care for Checkerboard Floors
Keeping your checkerboard floor looking its best is straightforward with the right care routine:
- Sweep or vacuum regularly to remove dust and debris.
- Mop with a mild, non-abrasive cleaner suitable for your tile material.
- Wipe up spills promptly to prevent staining, especially with natural stone or light-colored grout.
- Seal grout lines and natural stone tiles periodically to protect against moisture and discoloration.
With proper maintenance, your checkerboard bathroom floor will remain a standout feature for years to come.
Frequently Asked Questions
Is a checkerboard floor pattern suitable for small bathrooms?
Yes, the alternating tiles can actually make a small bathroom appear larger by creating visual depth. Choosing lighter colors and medium-sized tiles can further enhance this effect.
What materials work best for a checkerboard bathroom floor?
Durable and water-resistant materials like ceramic, porcelain, and vinyl are ideal. Natural stone can also be used for a luxurious touch, but it requires more maintenance.
How difficult is it to install a checkerboard tile pattern?
While the installation process is similar to other tile layouts, careful planning and precise measurements are essential for a symmetrical result. DIYers can use peel-and-stick tiles for an easier project, while more complex materials may require a professional installer.