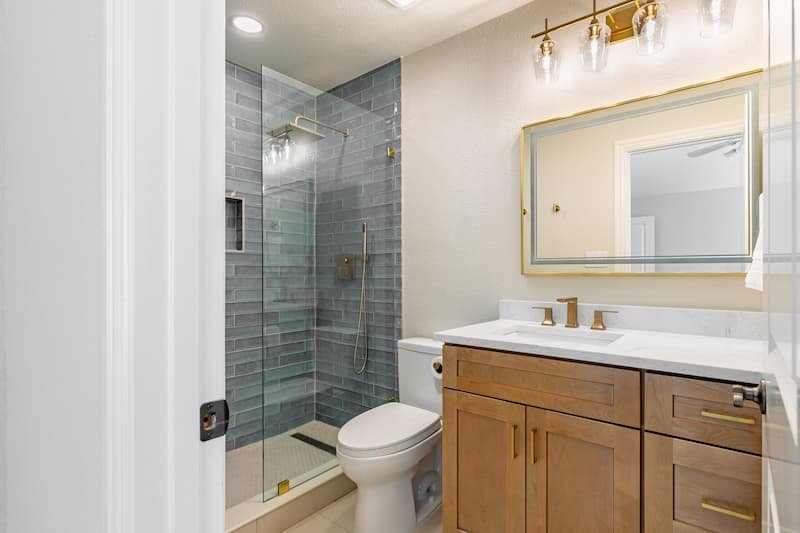
Replacing your bathroom floor yourself can be a rewarding project that saves money and gives your space a fresh look. Whether you’re dealing with worn-out tiles, water damage, or just want a style update, learning how to tackle a diy bathroom floor replacement is a practical skill for any homeowner. This guide walks you through each stage, from planning and prep to finishing touches, so you can approach your bathroom renovation with confidence.
Before you start, it’s important to assess your bathroom’s current condition and measure accurately. If you’re unsure about how to get precise measurements, check out measuring bathroom space correctly for tips that will help you plan your project efficiently and avoid costly mistakes.
Planning Your Bathroom Flooring Project
Preparation is key for a successful diy bathroom floor replacement. Start by setting a realistic budget and timeline. Research different flooring materials such as ceramic tile, vinyl planks, or waterproof laminate. Each has its pros and cons in terms of durability, water resistance, and installation difficulty.
- Tile: Classic and durable, but requires more tools and skill.
- Vinyl Plank: Easier for beginners, water-resistant, and affordable.
- Laminate: Stylish and simple to install, but check for water-resistant options.
Gather all necessary tools and materials before you begin. Typical supplies include:
- Flooring of your choice (plus 10% extra for cuts and waste)
- Utility knife, pry bar, and hammer
- Measuring tape and pencil
- Level and straightedge
- Adhesive or mortar (as required)
- Grout and spacers (for tile)
- Safety gear: gloves, goggles, and knee pads
Don’t forget to factor in time for removing and reinstalling fixtures like toilets or vanities if needed. For cost-saving inspiration, see cheap bathroom makeover ideas that still look amazing.
Removing the Old Bathroom Floor
Before installing new flooring, you’ll need to remove the existing material. This step can be messy, so wear protective gear and ventilate the room.
- Turn off the water supply and remove the toilet and any baseboards or trim.
- Use a utility knife to cut through caulk or sealant around the edges.
- For tile, use a hammer and chisel or pry bar to lift tiles. For vinyl or laminate, start at a corner and peel up the material.
- Remove any old adhesive or mortar from the subfloor. A scraper or oscillating tool can help with stubborn spots.
- Inspect the subfloor for water damage or rot. Replace any damaged sections before proceeding.
Proper removal ensures your new floor will lay flat and last longer. For more weekend-friendly upgrades, explore diy bathroom decor projects you can complete quickly.

Preparing the Subfloor for New Flooring
Once the old floor is removed, focus on getting the subfloor ready. A smooth, dry, and level base is crucial for a successful installation.
- Check for squeaks or loose boards and secure them with screws.
- Patch any holes or low spots with a leveling compound.
- Allow the subfloor to dry completely, especially if you’ve patched or replaced sections.
- For bathrooms, consider adding a waterproof membrane or underlayment to prevent future moisture issues.
Take your time with this step—rushing can lead to uneven flooring or future repairs. If you’re working with a tight budget, see what’s possible in a bathroom remodel under $1000.
Installing Your New Bathroom Floor
With the subfloor ready, you can move on to installing your chosen material. Here’s a general overview for the most common options:
Laying Tile
- Dry-lay tiles to plan your layout and minimize awkward cuts.
- Apply thin-set mortar with a notched trowel, working in small sections.
- Set tiles in place, using spacers for even grout lines.
- Allow mortar to cure, then apply grout and wipe away excess.
- Seal grout lines once dry to prevent staining and moisture intrusion.
Installing Vinyl Plank or Laminate
- Lay underlayment if required by the manufacturer.
- Start at one wall and work across the room, snapping planks together.
- Stagger seams for a natural look and trim planks to fit as needed.
- Leave a small expansion gap at the edges, which will be covered by baseboards.
Always follow the manufacturer’s instructions for your specific flooring product. If you’re new to home improvement, avoid common pitfalls by reviewing 10 common DIY bathroom remodeling mistakes before you begin.

Finishing Touches and Clean-Up
After your new floor is installed, there are a few final steps to complete the project:
- Reinstall the toilet, vanity, and any fixtures you removed.
- Replace or install new baseboards and caulk along the edges for a polished look.
- Clean the floor thoroughly to remove dust and debris.
- Allow adhesives or grout to cure fully before using the bathroom as normal.
Take this opportunity to add storage or decorative touches. For inspiration, browse different bathroom sink styles that can complement your new floor and overall design.
Maintaining Your New Bathroom Floor
Proper care will keep your new floor looking great for years. Here are some maintenance tips:
- Clean up water spills promptly to prevent damage, especially with laminate or wood-based floors.
- Use gentle, non-abrasive cleaners suitable for your flooring type.
- Place mats near the tub or shower to minimize water exposure.
- Check caulk and grout lines periodically and repair as needed.
Regular maintenance not only preserves your investment but also helps prevent future issues that could require another replacement.
Frequently Asked Questions
How long does a bathroom floor replacement take?
The timeline depends on the size of your bathroom and the type of flooring you choose. Most diy bathroom floor replacement projects can be completed in a weekend, though tile installations may require extra time for mortar and grout to cure.
Can I install new flooring over the old bathroom floor?
In some cases, yes—especially with vinyl planks or laminate, which can be floated over existing tile or vinyl if the surface is flat and in good condition. However, removing the old floor is recommended for best results and to address any hidden moisture or damage.
What’s the best flooring for a bathroom DIY project?
Vinyl plank flooring is popular for DIYers due to its water resistance, ease of installation, and affordability. Tile is also a great choice for durability, but it requires more skill and tools. Always choose materials rated for wet environments.
Do I need to waterproof the subfloor?
While not always required, adding a waterproof membrane or underlayment is a smart step in bathrooms to prevent moisture damage, especially if your home is prone to leaks or high humidity.
Conclusion
Tackling a bathroom floor upgrade yourself is a manageable project with the right preparation and tools. By following these steps and paying attention to detail, you can achieve a professional-looking result and enjoy a refreshed space. Remember to plan carefully, choose the right materials, and don’t rush the process. For more home improvement ideas, explore related guides and keep your bathroom looking its best for years to come.